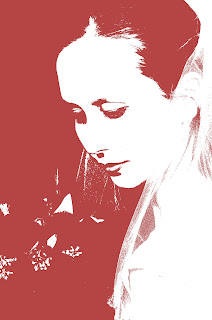
 Do you remember a couple days ago when I posted this and said I'd tell you tomorrow how I did it? Well we're a little past that "tomorrow" but it's better late than never right?
 If you like to play around with Photoshop Elements like I do, you may already know this trick. I accquired it from this article http://www.creativepro.com/article/turn-color-photos-duotones-photoshop which is actually for Photoshop - so if that's what you have, you're set too.
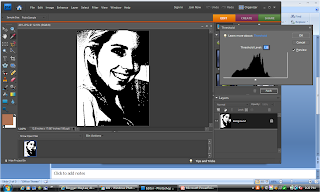
It took me a little reworking to locate the applicable buttons in PSE since the instructions are for PS. For your pleasure, please see below how I have also magicked my beautiful sister into a duotone picture.
For these, it seems (and I'm still playing with this) that the picture you're going to want to rework will be one where the subject is not in full shadow or full light. The process works with the balance.
I chose a picture I always liked of Rachel - she's actually dressed as a pirate, ahh irony.
1. Open your picture in PSE
2. On the menu bar, click Filter > Adjustments > Threshold
 The next part is where you determine what kind of a balance you want. Don't just trust what the first setting is.
3. Slide the threshold bar to the left and right
4. When you are happy with how it looks, click OK

The picture will become a little finer after you click OK.
You can be done there if you want or you can add color!
To add color,
1. On the menu bar, click Enhance > Adjust Color > Adjust Hue/Saturation
2. Click "colorize"
3. Experiment with all three sliders
a. the top - Hue adjusts what color is used
b. the middle - Saturation adjusts how much of that color is used
c. the bottom - Lightness adjusts how much white or black is added in
When you're happy, click OK and save it!


No comments:
Post a Comment